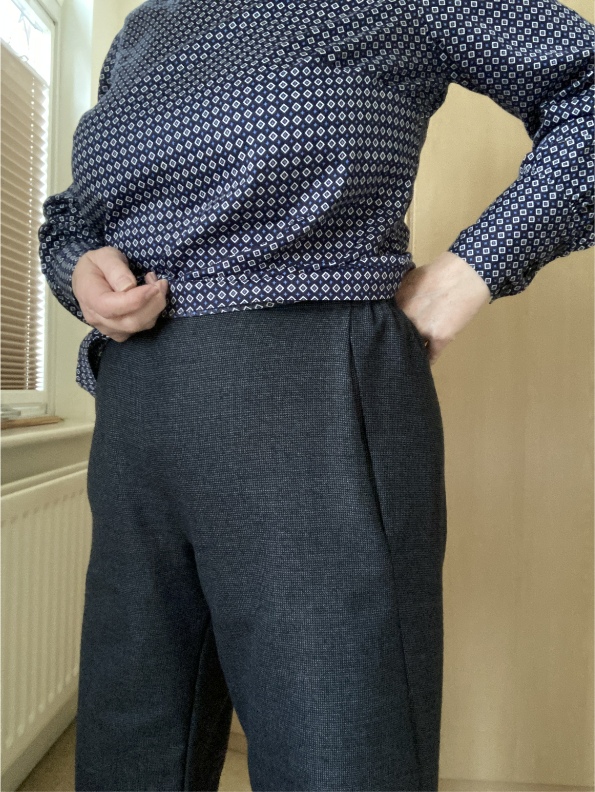
Well fitting trousers are a challenge for most dressmakers, and I’m no exception. I bought the Sure-Fit Designs Pants Kit, which got me fairly close but still the fit wasn’t quite right. But I was also looking for an easy project, something a little bit different, a bit more modern, and came across the Sidewinder “pants” by Sewing Revival, a New Zealand company. They’re flat-fronted with an elasticated back waist, and a seam which twists around from the base of the leg, up to the front and encloses in seam pockets.
As always, I checked out the reviews on Pattern Review and did an internet search, coming up with 2 reviews from people whose sewing I have followed for quite a while: Fabric Epiphanies and Susan Young Sewing. I didn’t see anything particularly negative so I took the plunge. I already had some fabric which had been in my stash for at least a year, it’s a dark blue/black wool mix which I’d always planned to make trousers with.
The Sidewinders are described as suitable for a “confident beginner”, which is probably true if said beginner happens to be 5’6″ tall, the height the pattern is drafted for. But I’m 5′ tall. There are instructions here for lengthening the Sidewinders, but there are no lengthen/shorten lines on the pattern which I think is a prerequisite on any pattern. To be fair, the website instructions do indicate where you should make adjustments but as they concentrate only on lengthening that made me a bit nervous, and a couple of reviews on Sewing Revival’s website mentioned how tricky it was to shorten them. So I contacted Janine, the owner of Sewing Revival, and she put my mind at rest. In any case I made my first pair at the 7/8 length, which works out at full length on me. When I get round to shortening the pattern I’ll do another review.
My second gripe with this pattern is that this page tells you how to choose your size, and includes a screenshot of the finished garment measurements. If you were to make your Sidewinders based on this, you would be sorely disappointed, because the pattern was updated some time ago and the current finished garment sizes do not match those on the web page. I was almost caught out but luckily I checked the instruction sheet, which gives very different sizes:
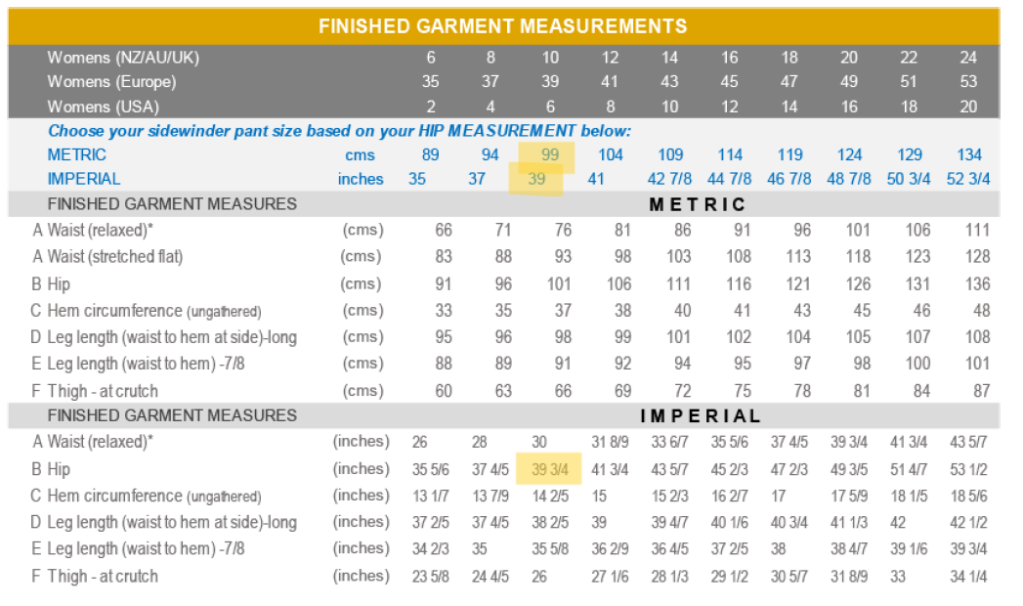
If I’d relied on the sizing chart shown on the website, I’d have assumed I had more than 2 inches of ease in the size 10 for my hip measurement of 39. Instead, there is just 3/4″ – not a lot of wiggle room! I made up just the waist facing in a size 10 to try that out, and found it was a tight squeeze to get over my hips so I sized up to the 12, which proved to be the right thing to do.
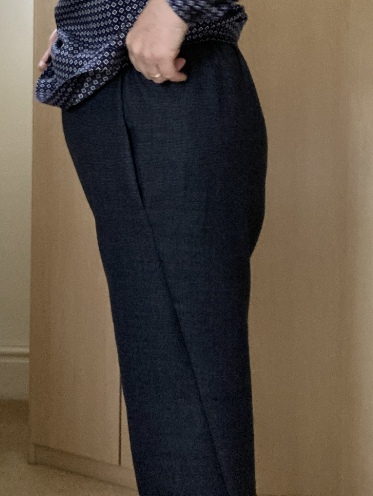
I knew these were low-waisted on someone the height the pattern is drafted for, but I prefer trousers to sit at my natural waist so I made up a toile “as is” (but minus the pockets) to see what adjustments I needed to make. The amount of ease around the hips was just right, and the trousers reached my natural waist at the back but were a few centimetres too short at the front. I’ll spare you the sight of me wearing them as they’re a bit see through (!), but here’s a pic of the waist:
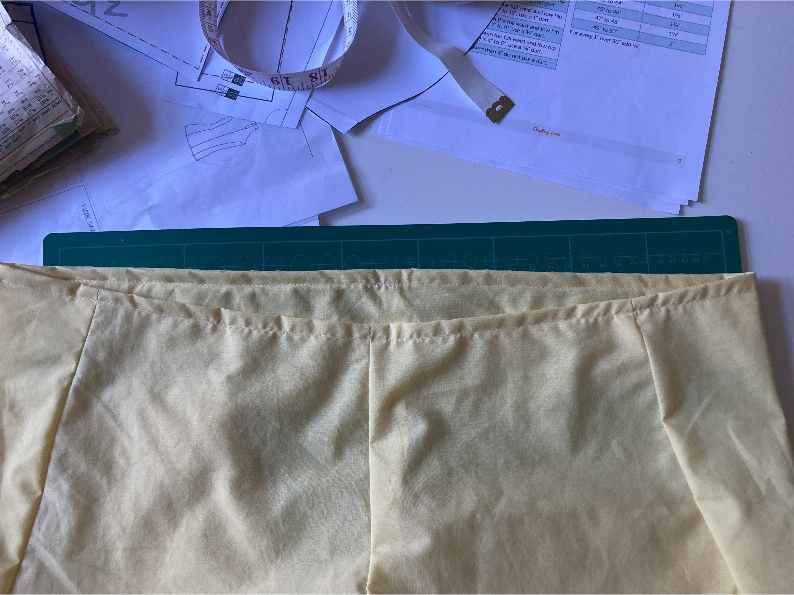
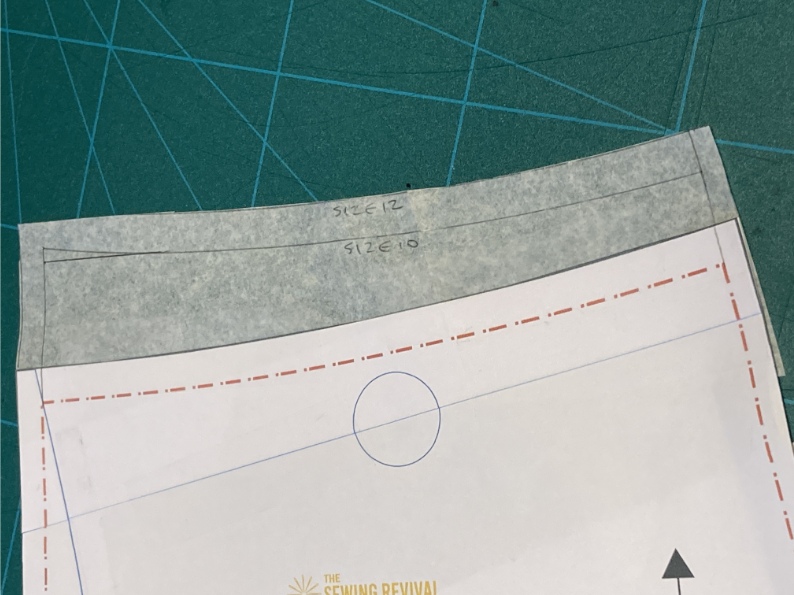
I adjusted both front & back pattern pieces, because – as you can see above – the waist gets lower as the back piece comes round to the front to meet the sidewinder seam. The front waist pattern adjustments are shown here:
I started cutting out my fashion fabric and – just in time – realised I’d have to add to the top of the pockets because of the way they’re sewn into the waist facing, and also redraft the waist facings. That done, I set to work and the trousers were only partly constructed when I realised that – niggles aside – these were going to be good. This was a really enjoyable sew because it’s a clever, well-drafted pattern and the instructions are good. It’s also quick to construct once you get your head around how the pockets attach to the front & back pieces of the trousers. Take my advice, don’t start this at 10pm!
I added a couple of steps which I felt were missing from the construction process, in that I understitched both the front of the pockets and the waist facing to give a better finish.
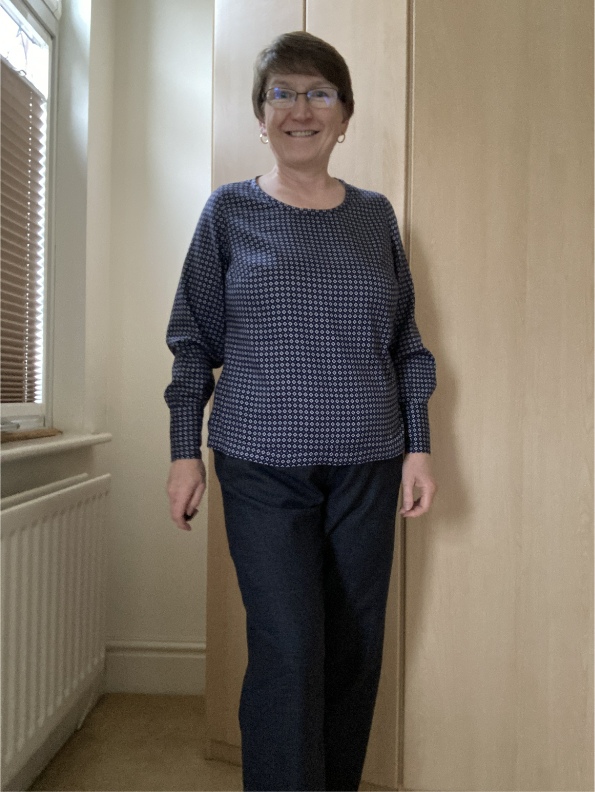
So what do I think? I love them, as you can probably tell from my smile in the first photo! I will be making a second pair almost immediately, although I’ve yet to decide whether or not to shorten them. I’ve probably added about 1cm too much to the height of the front waistband but as I never wear tops tucked in, I don’t care, I’ll just correct it on my next pair. I would also lower the back waist by the same amount. The other thing I would change is to use lining fabric for the pockets because, after a while (and a big meal!), the outline of the pockets appeared either side of the centre front seam and it looks a bit odd. But that’s not a fault of the pattern, I think this fabric is probably just a little bit too thin.
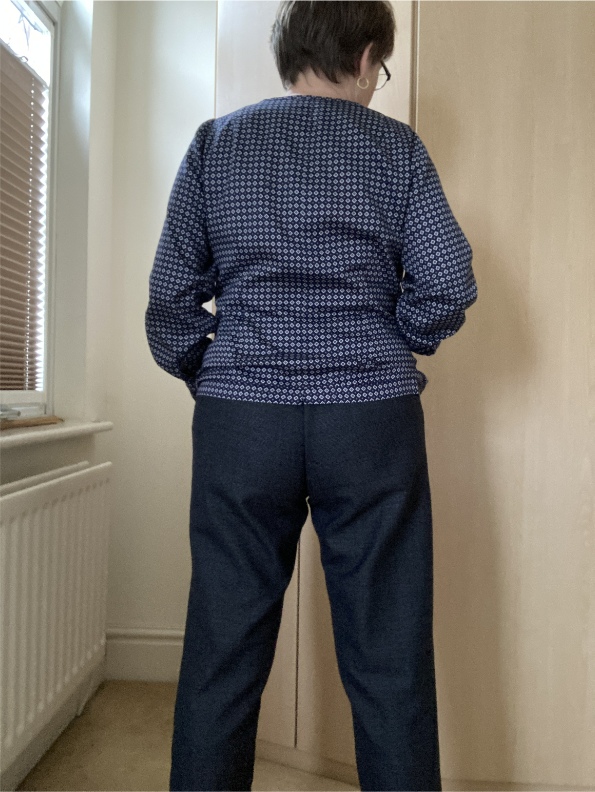
Now I’m sure there will be purists who look at all the wrinkles in the back view below and throw up their hands in horror! But as someone who has spent ages obsessing about fit, achieving trousers with less wrinkles but far less comfort, I am also learning not to care too much about that either!